

Tutorial: Build an in-app documentation assistant
Build and embed an in-app documentation assistant that answers user questions with cited information from your Mintlify documentation site.
What you'll build
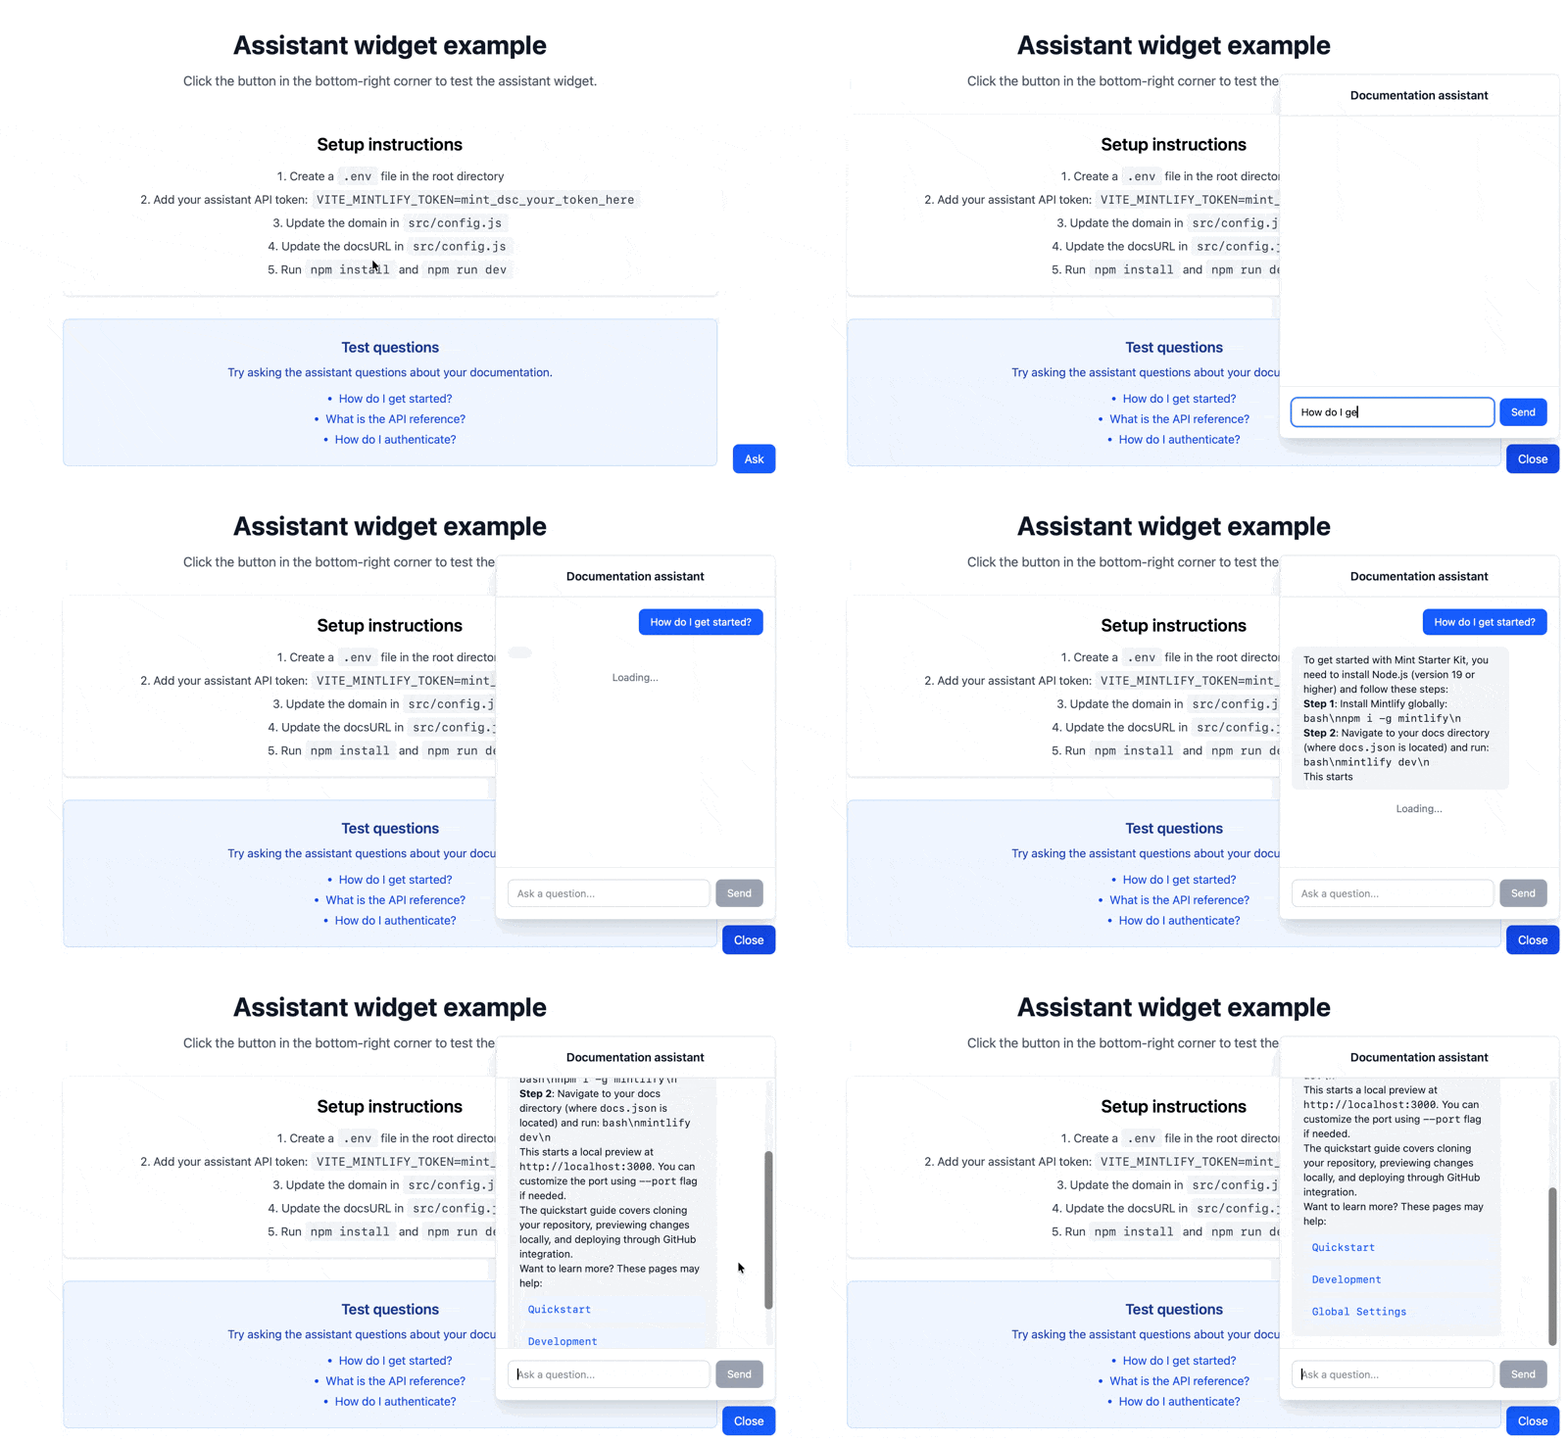
Section titled “What you'll build”A reusable widget that embeds the assistant directly in your application. The widget provides:
- A floating button that opens a chat panel when clicked
- Real-time streaming responses based on information from your documentation
- Message rendering with Markdown support
Users can use the widget to get help with your product without leaving your application.
Prerequisites
Section titled “Prerequisites”- The Mintlify assistant enabled
- Your domain name, which appears at the end of your dashboard URL. For example, if your dashboard URL is
https://app.mintlify.com/org-name/domain-name, your domain name isdomain-name - An assistant API key
- Node.js v18 or higher and npm installed
- Basic React knowledge
Get your assistant API key
Section titled “Get your assistant API key”- Navigate to the API keys page in your dashboard.
- Click Create Assistant API Key.
- Copy the assistant API key (starts with
mint_dsc_) and save it securely.
Set up the example
Section titled “Set up the example”Clone the example repository and customize it for your needs.
Clone the repository
Bash git clone https://github.com/mintlify/assistant-embed-example.git cd assistant-embed-exampleChoose your development tool
The repository includes Next.js and Vite examples. Choose the tool you prefer to use.
Next.js cd nextjs npm installVite cd vite npm installConfigure your project
Open
src/config.jsand update with your Mintlify project details.src/config.js export const ASSISTANT_CONFIG = { domain: 'your-domain', docsURL: 'https://yourdocs.mintlify.site', };Replace:
your-domainwith your Mintlify project domain found at the end of your dashboard URL.https://yourdocs.mintlify.sitewith your actual documentation URL.
Set up your API key
Store your assistant API key as a server-side environment variable. Avoid the
VITE_prefix, which bundles the value into your client code:.env MINTLIFY_TOKEN=mint_dsc_your_token_hereReplace
mint_dsc_your_token_herewith your assistant API key.Then add a backend route (for example,
/api/assistant) to proxy requests to the Mintlify API:- Accept the user's message from the widget.
- Attach the
Authorization: Bearer $MINTLIFY_TOKENheader and forward the request tohttps://api.mintlify.com/discovery/v1/assistant/{domain}/message. - Stream the upstream response back to the client unchanged, so token streaming and
X-Thread-Id/X-Thread-Keyheaders reach the widget. - Point the widget's
apioption at your backend route instead of the Mintlify API directly.
Start the development server
Bash npm run devOpen your application in a browser and click the Ask button to open the assistant widget.
Customization ideas
Section titled “Customization ideas”Source citations
Section titled “Source citations”Extract and display sources from assistant responses:
const extractSources = (parts) => {
  return parts
    ?.filter(p => p.type === 'tool-invocation' && p.toolInvocation?.toolName === 'search')
    .flatMap(p => p.toolInvocation?.result || [])
    .map(source => ({
      url: source.url || source.path,
      title: source.metadata?.title || source.path,
    })) || [];
};

// In your message rendering:
{messages.map((message) => {
  const sources = message.role === 'assistant' ? extractSources(message.parts) : [];
  return (
    <div key={message.id}>
      {/* message content */}
      {sources.length > 0 && (
        <div className="mt-2 text-xs">
          <p className="font-semibold">Sources:</p>
          {sources.map((s, i) => (
            <a key={i} href={s.url} target="_blank" rel="noopener noreferrer" className="text-blue-600">
              {s.title}
            </a>
          ))}
        </div>
      )}
    </div>
  );
})}
Track conversation threads
Section titled “Track conversation threads”Store thread IDs and thread keys to maintain conversation history across sessions.
When a user creates a new conversation thread, the server returns two values in the response headers:
X-Thread-Id: The thread identifierX-Thread-Key: A secret key for the thread (only returned once, when you create the thread)
You must capture and persist both values on the first response. On every subsequent message, include both threadId and threadKey in the request body. If you send a threadId without the corresponding threadKey, the server returns a 404 error.
import { useState, useEffect } from 'react';

export function AssistantWidget({ domain, docsURL }) {
  const [threadId, setThreadId] = useState(null);
  const [threadKey, setThreadKey] = useState(null);

  useEffect(() => {
    // Retrieve saved thread ID and key from localStorage
    const savedId = localStorage.getItem('assistant-thread-id');
    const savedKey = localStorage.getItem('assistant-thread-key');
    if (savedId && savedKey) {
      setThreadId(savedId);
      setThreadKey(savedKey);
    }
  }, []);

  const { messages, input, handleInputChange, handleSubmit, isLoading } = useChat({
    api: '/api/assistant',
    body: {
      fp: 'anonymous',
      retrievalPageSize: 5,
      ...(threadId && { threadId }),
      ...(threadKey && { threadKey }),
    },
    streamProtocol: 'data',
    sendExtraMessageFields: true,
    fetch: async (url, options) => {
      const response = await fetch(url, options);
      const newThreadId = response.headers.get('x-thread-id');
      const newThreadKey = response.headers.get('x-thread-key');
      if (newThreadId) {
        setThreadId(newThreadId);
        localStorage.setItem('assistant-thread-id', newThreadId);
      }
      if (newThreadKey) {
        setThreadKey(newThreadKey);
        localStorage.setItem('assistant-thread-key', newThreadKey);
      }
      return response;
    },
  });

  // ... rest of component
}
Add keyboard shortcuts
Section titled “Add keyboard shortcuts”Allow users to open the widget and submit messages with keyboard shortcuts:
useEffect(() => {
  const handleKeyDown = (e) => {
    // Cmd/Ctrl + Shift + I to toggle widget
    if ((e.metaKey || e.ctrlKey) && e.shiftKey && e.key === 'I') {
      e.preventDefault();
      setIsOpen((prev) => !prev);
    }

    // Enter (when widget is focused) to submit
    if (e.key === 'Enter' && !e.shiftKey && document.activeElement.id === 'assistant-input') {
      e.preventDefault();
      handleSubmit();
    }
  };

  window.addEventListener('keydown', handleKeyDown);
  return () => window.removeEventListener('keydown', handleKeyDown);
}, [handleSubmit]);